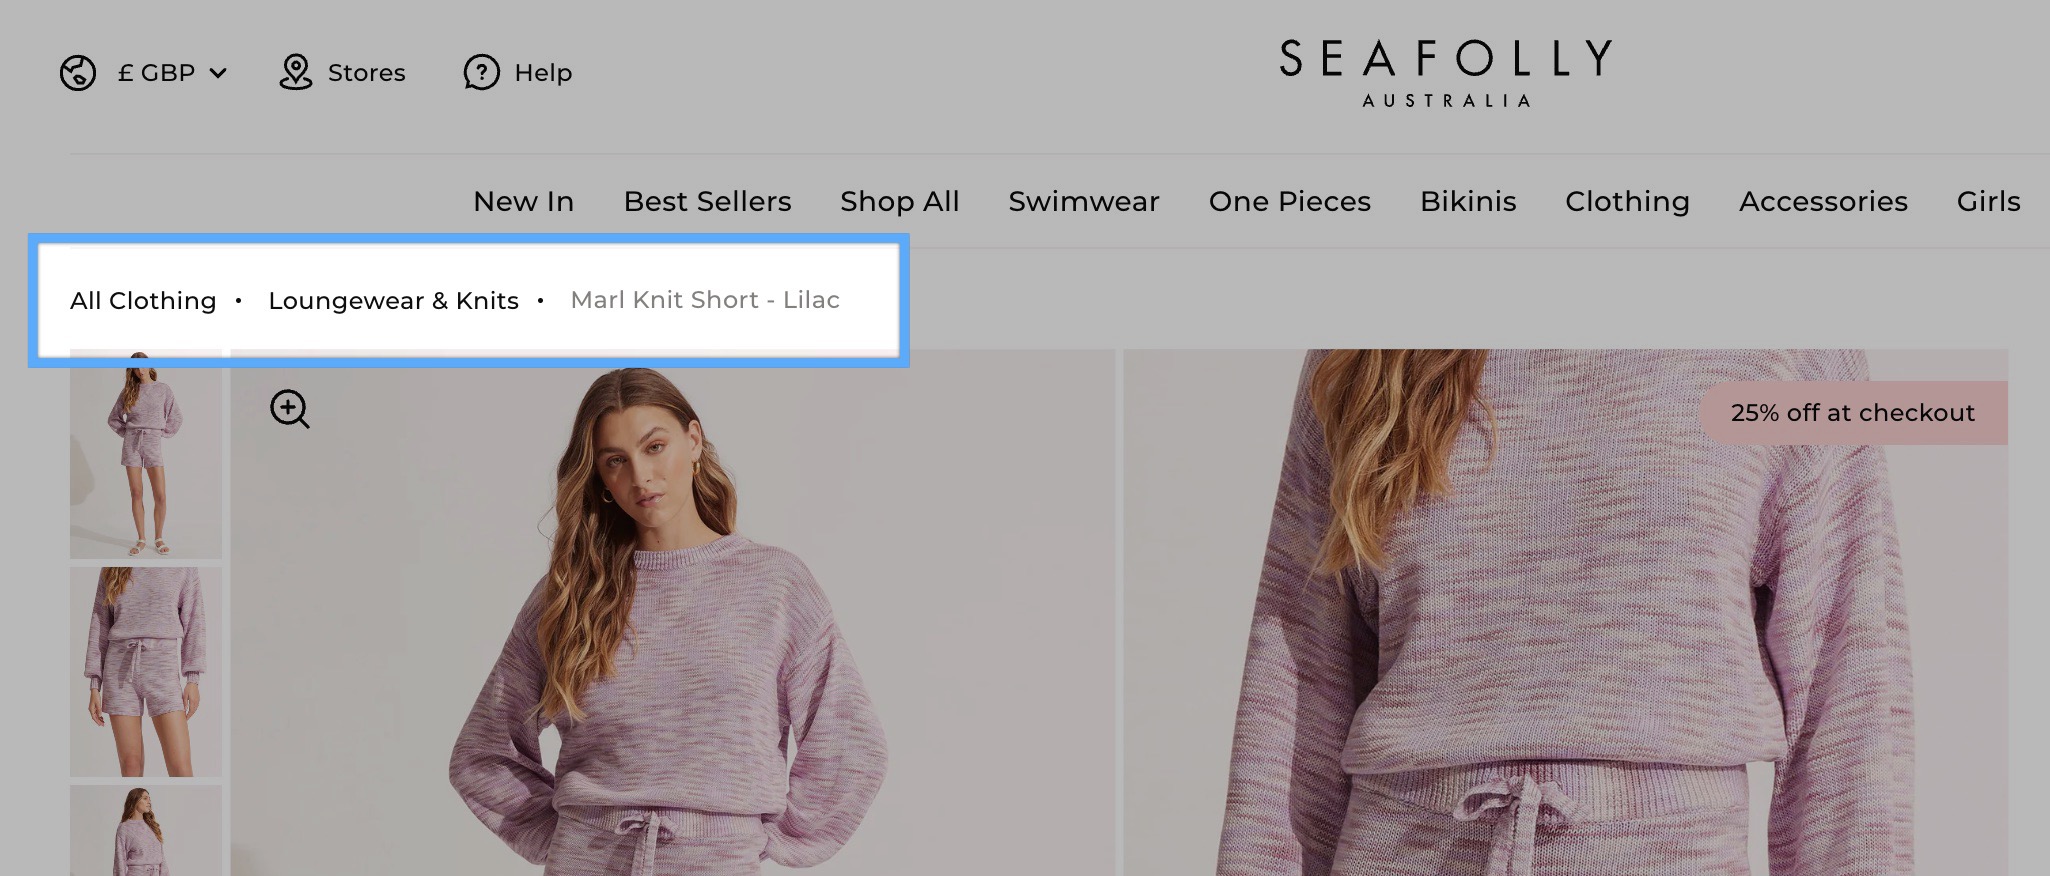
Breadcrumbs show a user’s location within your store hierarchy and help search engines understand how your products are organized.
On Shopify, the native breadcrumb structure is limited, especially on product pages, causing both SEO and navigation issues.
Risify solves these gaps by generating a consistent, Google-readable breadcrumb trail on every product and collection page.
Merchants who want accurate breadcrumb display, clearer product hierarchy, and stronger SEO benefit from Risify Breadcrumb. It ensures correct navigation even when users land directly on a product page instead of coming from a collection.
👉 Curious how Risify Breadcrumbs can help your store? Browse our Breadcrumbs resource library to learn best practices and get the most value from it.
Shopify Default vs Risify Breadcrumb Comparison
|
Shopify Default Shortfall |
Risify Solution |
|---|---|
|
Breadcrumbs only appear when a user arrives through a collection URL |
Breadcrumbs always display, regardless of how the page is accessed |
|
Google cannot reliably read Shopify’s breadcrumb markup |
Adds correct Breadcrumb Schema so Google can index hierarchy properly |
|
Product URLs in sitemaps don’t reflect collection structure |
Detects and displays the correct parent and sub-collection automatically |
|
No support for multi-level collections |
Supports parent > child collection hierarchies |
|
Inconsistent user navigation experience |
Provides a clear, stable breadcrumb trail on all product and collection pages |
Two Phases of Risify Breadcrumb Setup
The breadcrumb setup in Risify has two phases :
- Phase 1: You’ll configure breadcrumbs in Shopify Admin. In this phase, you decide how each breadcrumb path should appear for collections and products.
- Phase 2: You’ll add and style the breadcrumb section in your storefront theme (Theme Customization).
This makes the breadcrumbs visible on your live store.
If you finish Phase 1 and don’t see any breadcrumbs yet, don’t worry. They will appear after completing Phase 2.
Phase 1 - Configure Breadcrumbs in Admin
You’ll set up the breadcrumb paths directly inside your Shopify Admin. Start with Collections , then move to Products if needed.
Set Breadcrumbs for a Collection or Product
You’re defining the path that both shoppers and search engines will follow for this specific collection.
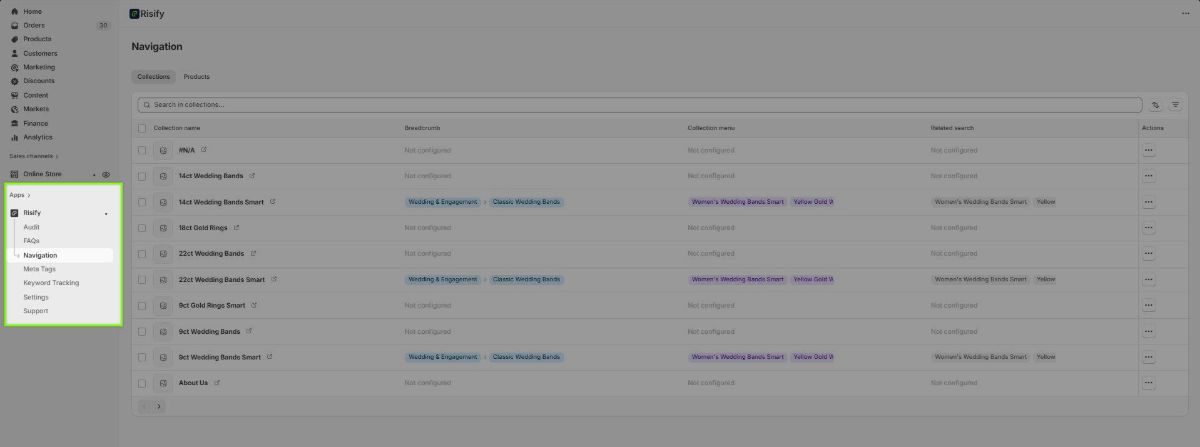
1) Go to Apps → Risify → Navigation.
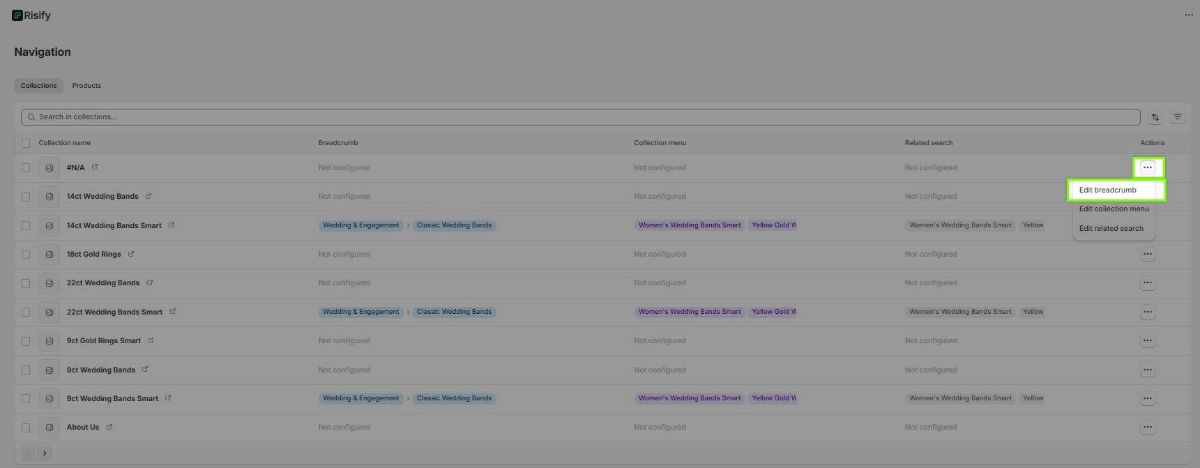
3) Find the collection or product you want to edit. In the Actions column, click the three dots (⋯) and select Edit breadcrumb.
4) A small pop-up window opens (called an edit window). In Search in Label , type and add the items that should appear in the path.
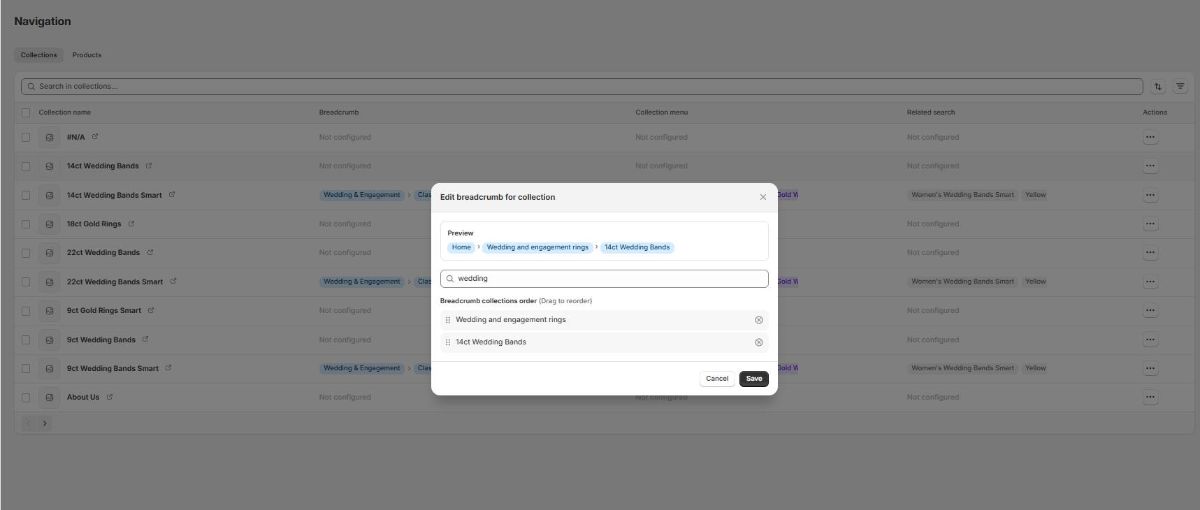
For example, Home page , Living Room , and Sofa Sets.
5) Drag and drop items in Breadcrumb Collections Order to rearrange them. Use the X icon to remove any item if needed.
6) Check the Preview section at the top to confirm the correct order.
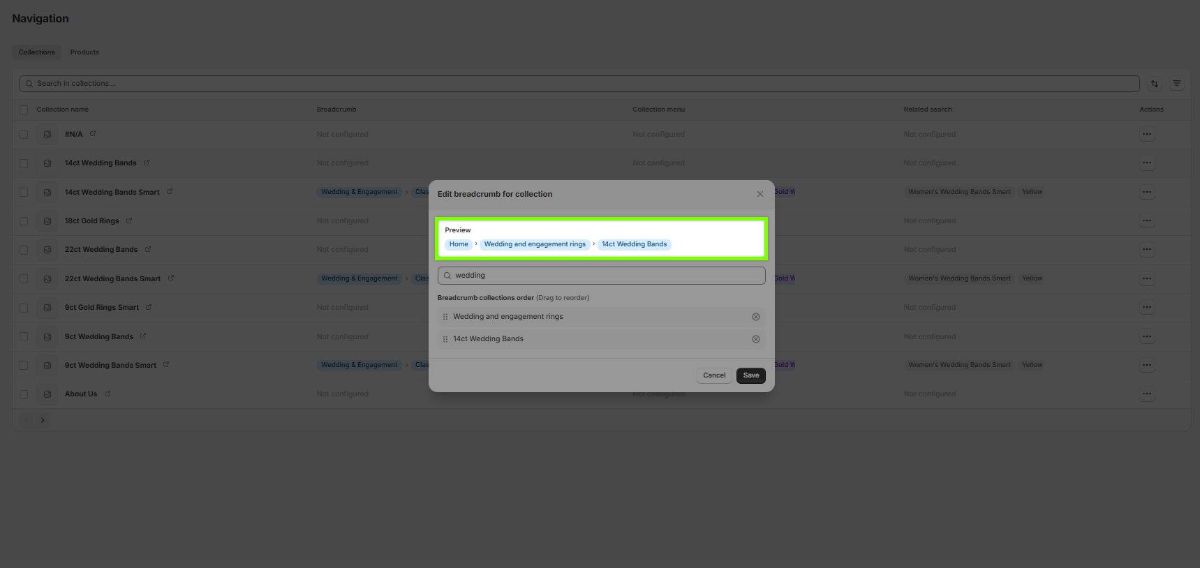
7) Click Save.
Tips for Organizing Breadcrumbs
- Keep breadcrumb paths short and consistent. Two or three levels are usually ideal.
- Use the main collection that best represents each product.
- If you rename or reorganize collections, revisit breadcrumbs to ensure accuracy.
What Happens Next
Your breadcrumb structure is now saved inside Risify’s Admin. However, it will not appear on your storefront yet.
In Phase 2 (Theme Customization) , you’ll add the breadcrumb section to your theme and adjust its design to match your store’s layout.
Breadcrumbs - Phase 2: Adding and Customizing in Your Storefront Theme
After setting up your breadcrumbs in Phase 1 , you now need to display them on your storefront. This step is done through Shopify’s Theme Customization panel and lets you style and position the breadcrumbs so they fit your store’s design.
Step 1: Access Your Theme Customization
Open the exact page you want to edit
When you open the theme editor you land on the home page. From here:
- If you want to add breadcrumbs to a collection page, switch to the collection template you want to edit. If you haven’t created custom templates, you can simply use the Default collection template.
- If you want to add them to a product page, switch to the product template you want to edit. If you don’t have multiple templates, select the Default product template instead.
After selecting the template, navigate to the specific collection or product where you previously assigned your breadcrumbs. This ensures the correct content appears when you add the section.
Step 2: Add the Risify Breadcrumb Section
Confirm the page is visible in the preview. In the left sidebar, locate the Template group for this page. You’re now ready to add the breadcrumb:
1) Once you’re viewing the right page, open the template panel on the left and click Add section .
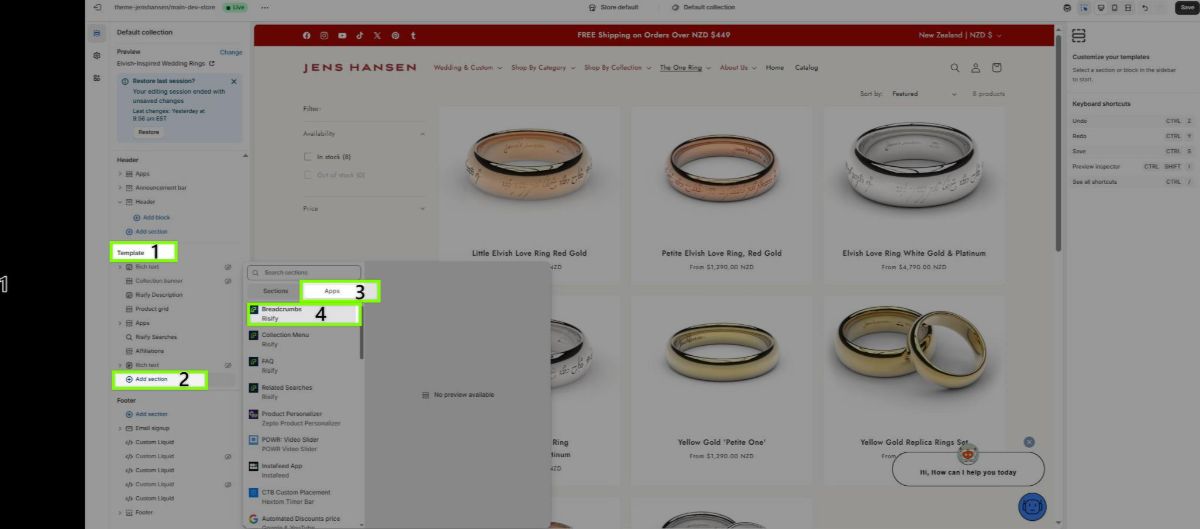
2) Choose the Apps tab and select Risify Breadcrumbs . The breadcrumb section will appear on your page.
3) Drag it up to the top of your template so it appears above all other sections (for example, above banners or product grids).
This ensures that shoppers see your breadcrumb path immediately when they open a page.
Step 3: Customize Your Breadcrumbs
Once added, click the Risify Breadcrumb section in the sidebar to open its settings panel. These options let you fully adjust how your breadcrumbs look and feel to match your store’s theme.
General
- Section Width : Choose whether the breadcrumb matches your theme’s content width, spans the entire screen, or adapts to its container layout.
- Show Page Title: Enables or hides the current page title next to the breadcrumb path.
- Show Collections Text: Displays the word “Collections” or a similar label before the path. Use it if you want to clarify the breadcrumb’s context.
Home Link
Display Type: Choose how the home icon appears in your breadcrumb.
- None hides it completely.
- Icon shows a small home symbol.
- Text displays the word “Home.”
Style: Select from predesigned home icon styles (e.g., “Home 01”).
Custom Icon: Upload or select your own icon image if you want a unique design.
Divider
- Style: Choose the separator symbol between breadcrumb levels, such as “>” or “/.”
- Custom Icon: Optionally upload your own divider graphic.
Content & Typography
- Homepage Text: Change the text displayed for your home link (for example, “Home” or “Main”).
- Font Family: Select your theme’s font or choose another available typeface.
- Font Size: Adjust the breadcrumb text size (measured in pixels).
- Font Weight: Choose how bold the text appears (e.g., Medium 500, Bold 700).
- Text Format: Pick between “Capitalize,” “Uppercase,” or “Lowercase” styles.
Colors
- Home Link: Adjust the color of the home icon or text.
- Primary Link: Sets the color for intermediate breadcrumb links.
- Active Page: Controls the color of the final (current) page in the breadcrumb trail.
- Divider: Sets the color for the symbol separating each breadcrumb level.
Spacing
- Padding Top & Bottom: Controls how much space appears above and below the breadcrumb section.
Increase values for more breathing room or reduce them for a tighter layout.
Step 4: Review and Save
After making adjustments:
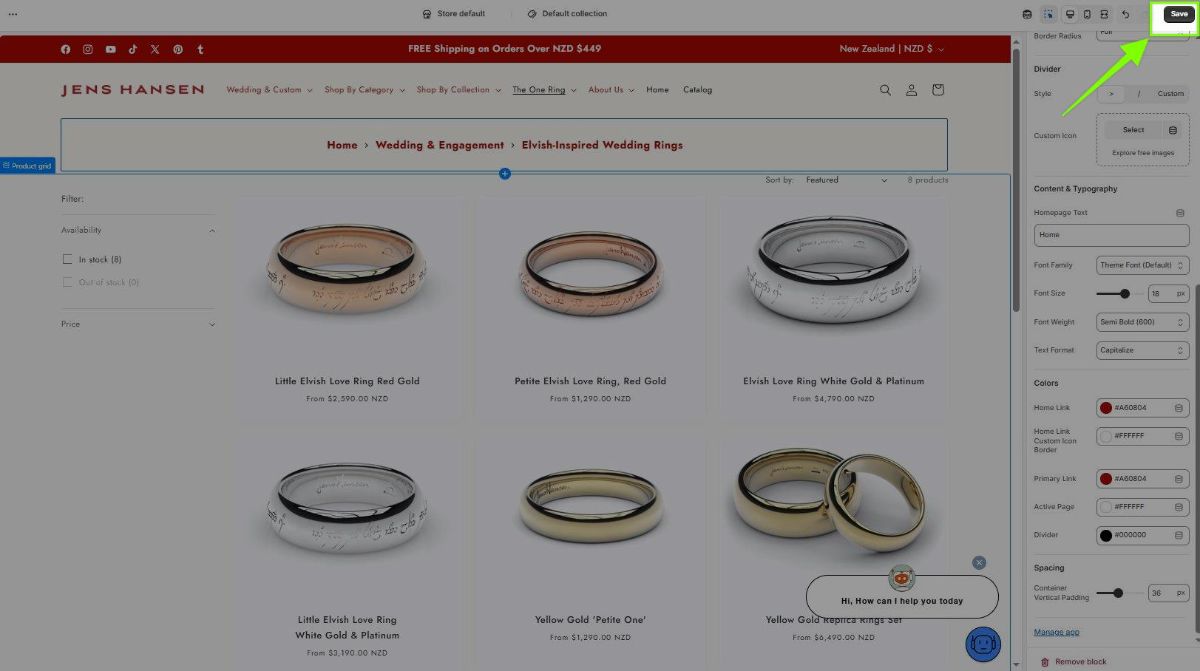
1) Use the Preview panel to confirm that your breadcrumb path, spacing, and style look correct.
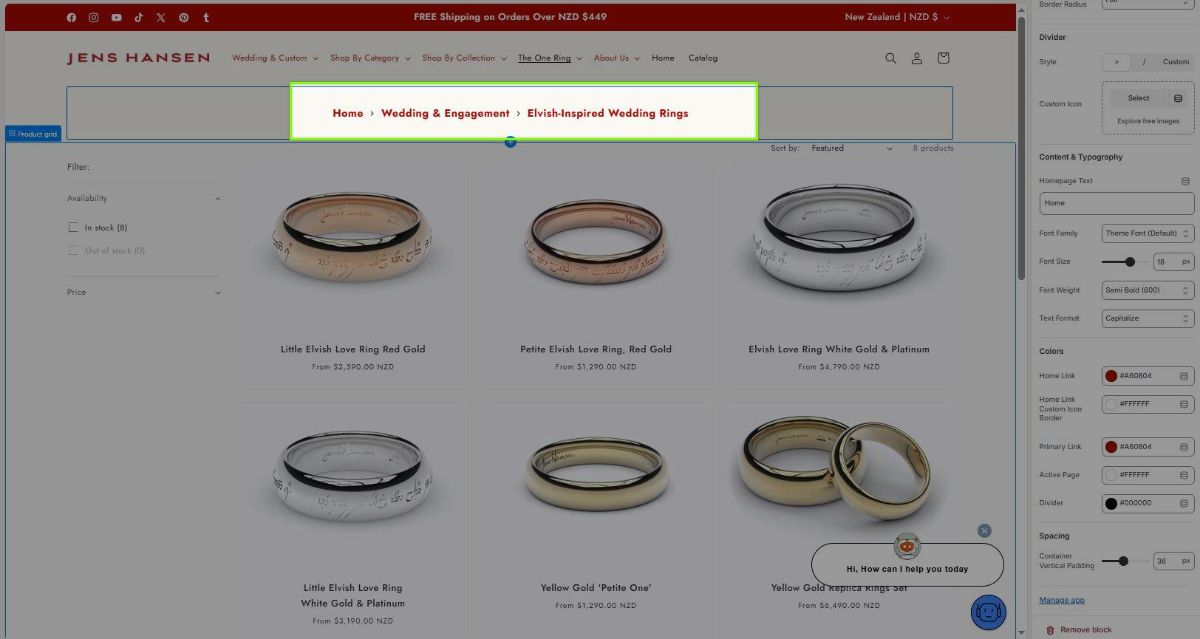
2) When you’re happy with the setup, click Save in the top-right corner of the theme editor.
3) Visit your live store and refresh the page to confirm that the breadcrumbs display as expected.
Summary: How To Set Up Risify Breadcrumbs
By completing both phases:
- Phase 1 defines your breadcrumb paths inside Risify’s admin panel.
- Phase 2 adds and styles those breadcrumbs visually inside your Shopify theme.
Together, these steps ensure that your breadcrumb structure is both SEO-friendly and perfectly integrated with your store’s design.
Why You Need Risify Breadcrumbs
Shopify’s native breadcrumb system is limited. It only shows breadcrumbs when a visitor arrives on a product page through a collection URL. If someone visits the same product directly from Google or another link, the breadcrumb disappears, and Google can’t read it properly.
Risify solves these problems by allowing you to define consistent breadcrumb paths for both collection and product pages, regardless of how users reach them.
This ensures two key benefits:
- Your store’s hierarchy is always visible to customers.
- Google correctly understands your site structure, improving SEO and page relevance.