Adding relevant FAQs to the product & collection pages have tons of benefits. We experienced firsthand that providing helpful FAQs on the website builds trust and authority for search engines and visitors. It helps with both search engine ranking and conversion rates as you can answer users' questions in advance.
We wanted to make this easy for Risify clients. We have created a system where you can have a centralized FAQ management system directly using Shopify content fields without being dependent on any third-party application.
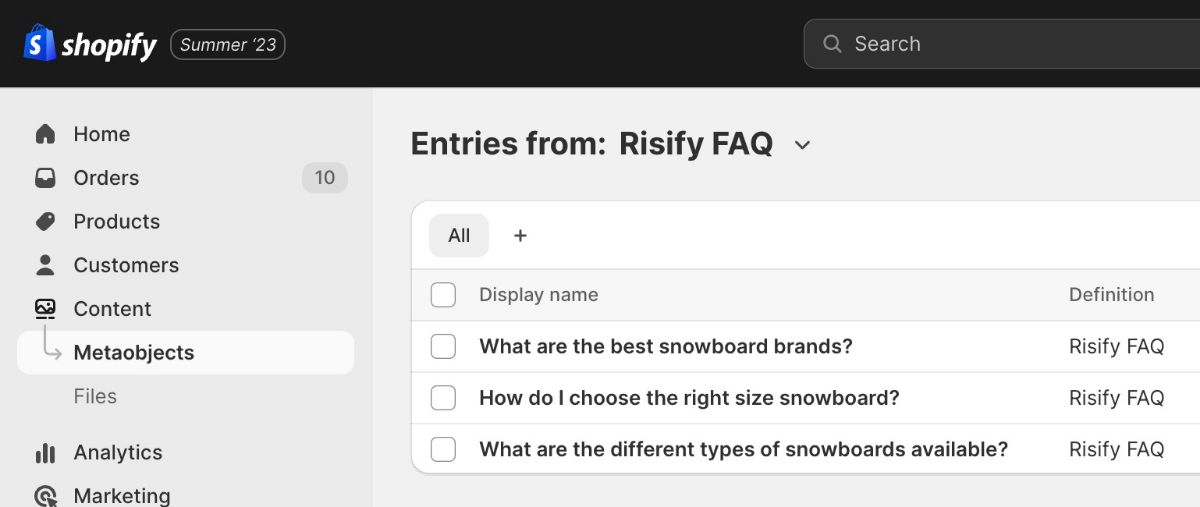
Risify sets this up for you - and it is managed through Shopify's custom meta objects. We are adding the store-front FAQ snippet to the product and collection pages.
Step 1: Activate Risify FAQ
Risify FAQ works using Shopify Content Meta fields. You can keep using the content independent from the Risify app.
Step 2: Create FAQs Using AI
Create FAQs using Risify AI and assign them to the relevant products and collections.
Step 3: Add FAQs to Your Storefront
Easily add Risify FAQs to your store front using Shopify App Embeds.
All the content is hosted by Shopify - using Shopify Metaobjkects. You can use the content independent from Risify.
Advantages:
- Centralized FAQ system to manage all FAQs in one place.
- Using Shopify native content fields - no third-party dependency
- Being able to use the same FAQ element on different pages
- Google Schema FAQ implementation
DOs
- Start adding FAQ to essential collections and products
- Check out your previous client questions - original FAQs are the best
- Use original content for the answers
- Link to the relevant blog posts if you have one
DONTs
- Use the same FAQ on each page - try making it relevant.
- Write long answers FAQ should be short and easy to understand
- Use copy/paste content - write original answers or at least update your content to be unique
How to Manage FAQs with Risify?
The same FAQ element can be used on multiple pages; all you need to do is assign it.
At Risify, we don't host critical data on our servers; instead, we use Shopify meta objects so that you can use them independently from Risify.
That allows us to manage the Risify FAQ feature in two ways:
- through Risify
- through Shopify
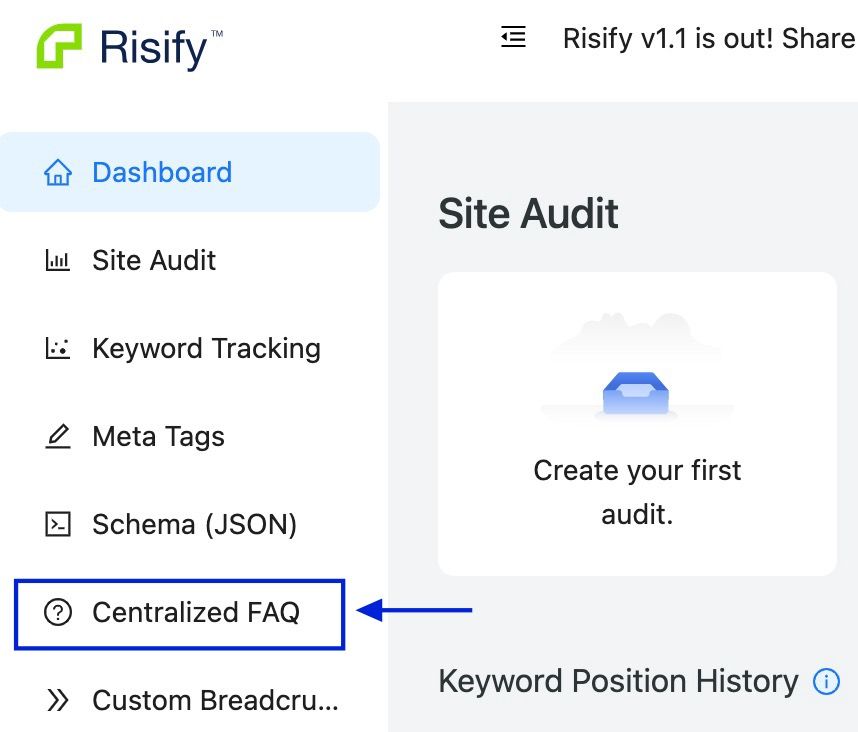
Option 1: Through Risify Dashboard
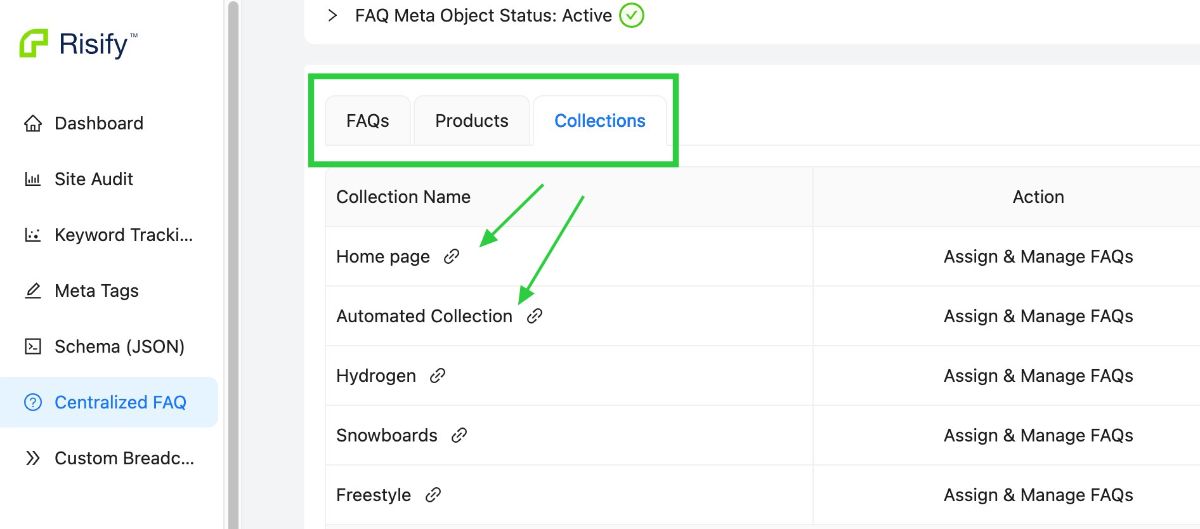
The first way to assign FAQs is to utilize the user-friendly Risify interface. On the Centralized FAQ management page , you'll find three active tabs: FAQs, Products, and Collections.
When you're modifying FAQs on Risify, you can use two methods.
You can either start by selecting the FAQs and then assigning them to products, or you can start by choosing the products and collections and then manage the FAQs for those products.
1️⃣ Bulk Assign FAQs to Products
If you prefer to select the FAQs first, then assign them to products, then take the following actions:
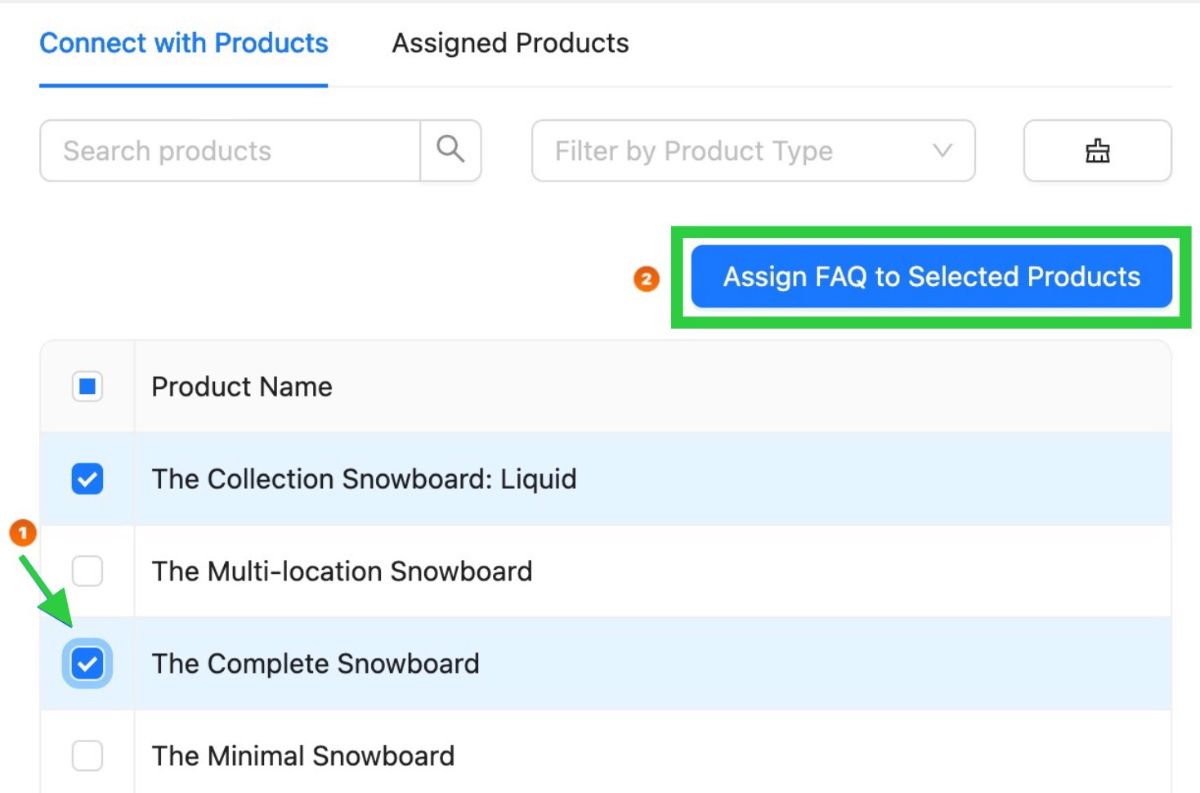
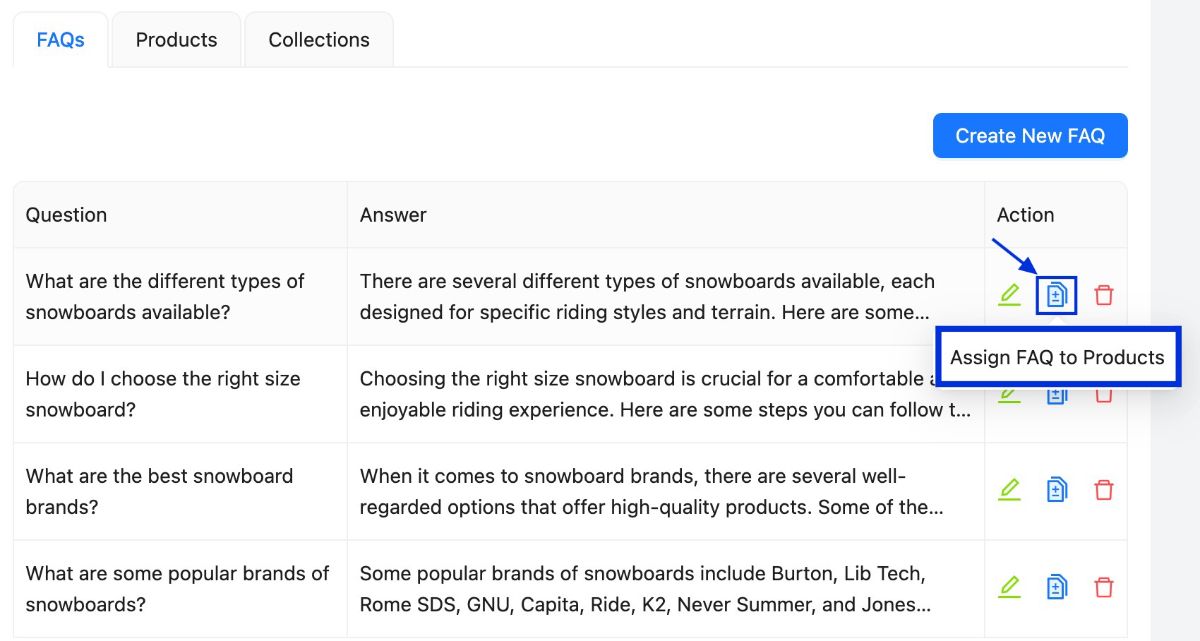
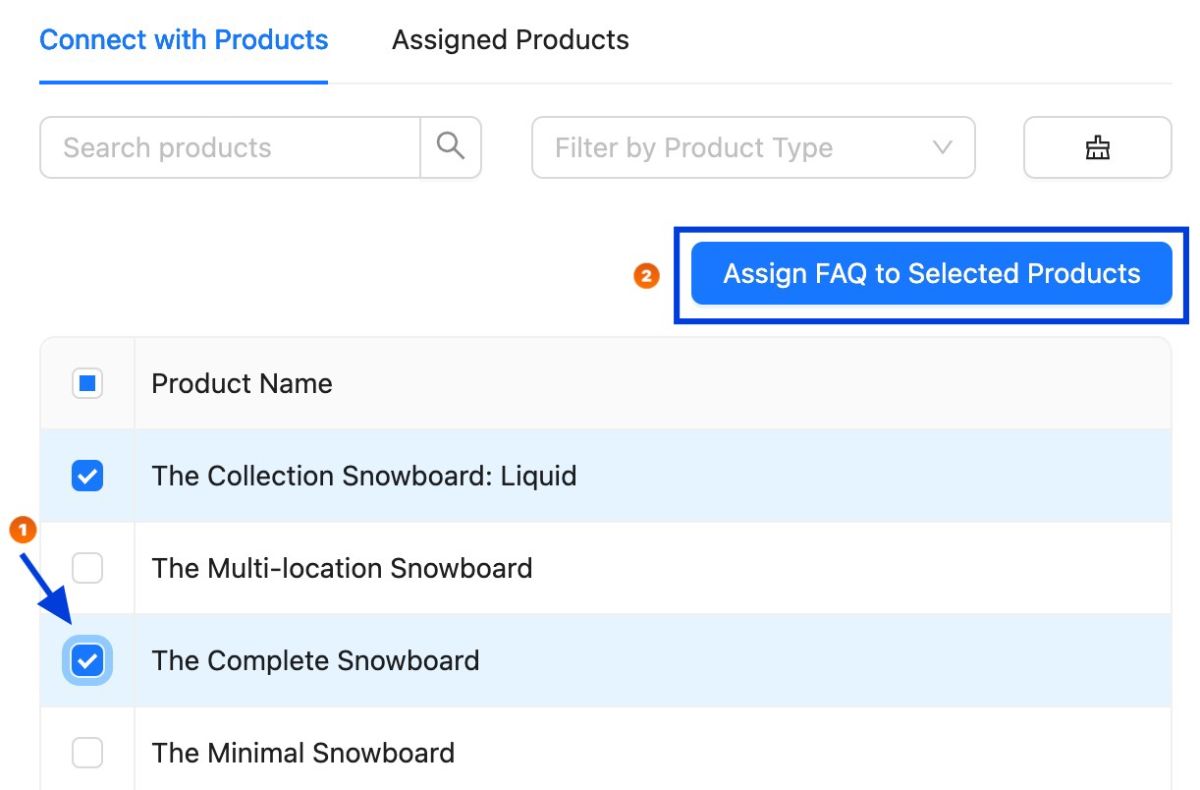
You’re done!
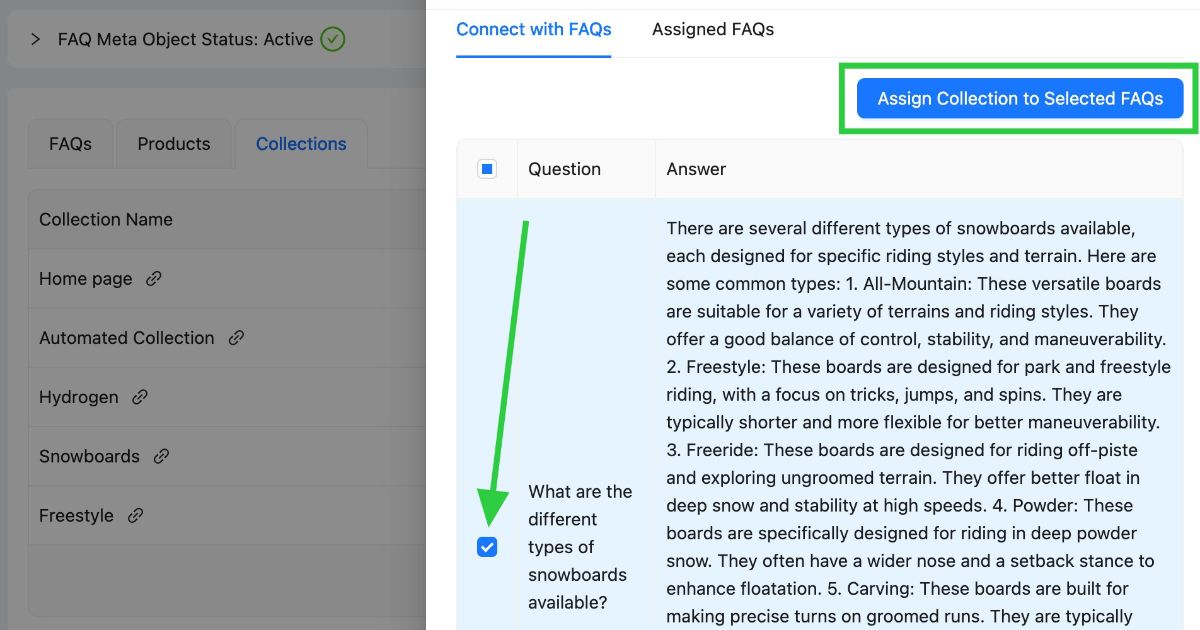
2️⃣ Product/Collection to Bulk Assign FAQs
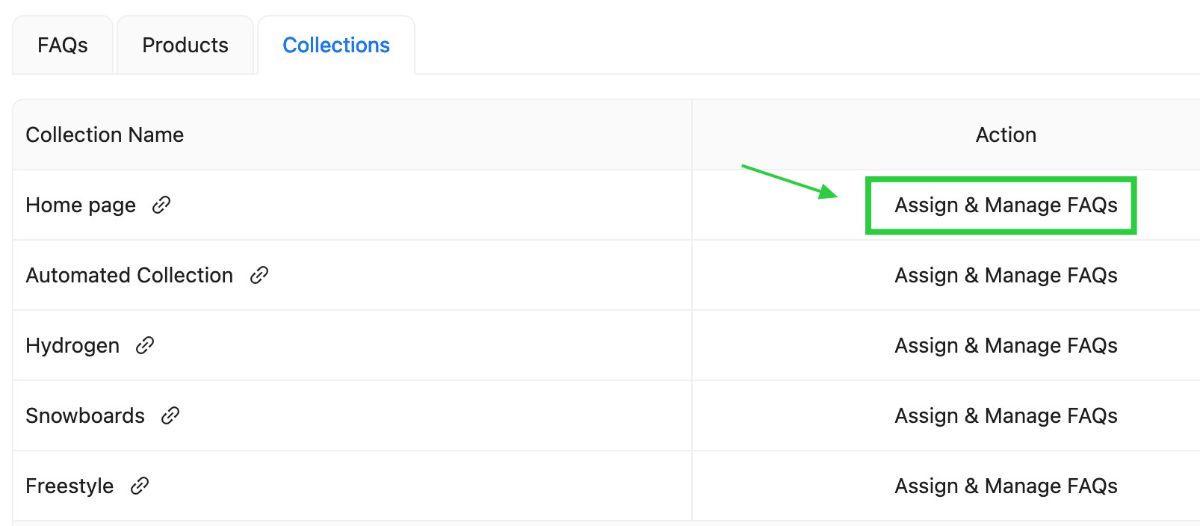
Alternatively, you can follow these steps if you'd rather select the products and collections first, then manage the FAQs:
Click the Product or collection tab and select product/collection
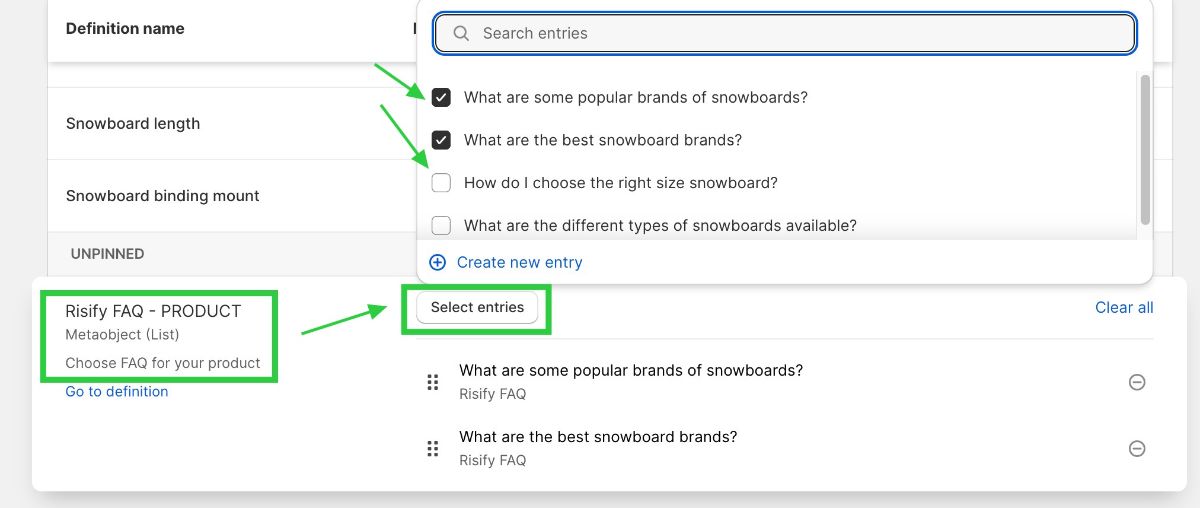
Option 2: Through Shopify Product/Collection Meta Fields
Another option is using the Shopify product and collection meta fields. On the product page, you can modify FAQs for each product and collection individually.
To apply this to your Shopify store, just follow these simple steps:
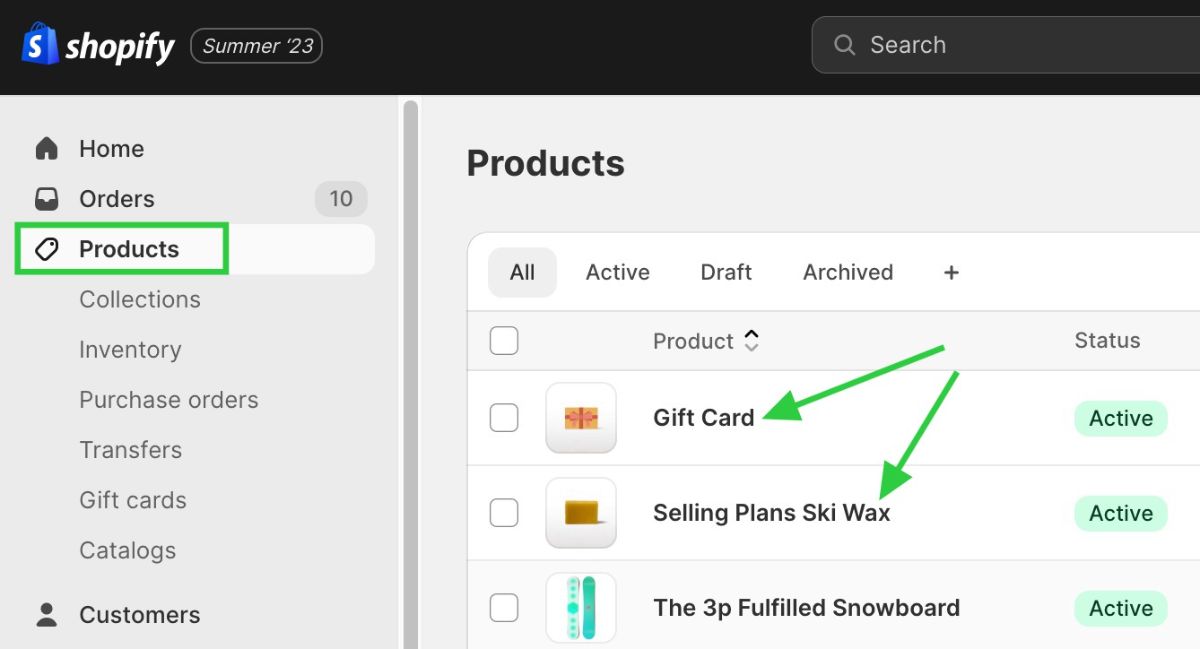
Go to the Products section in the left side menu. Then click on a product or collection.
Scroll down and look for metafields. Click Show all.
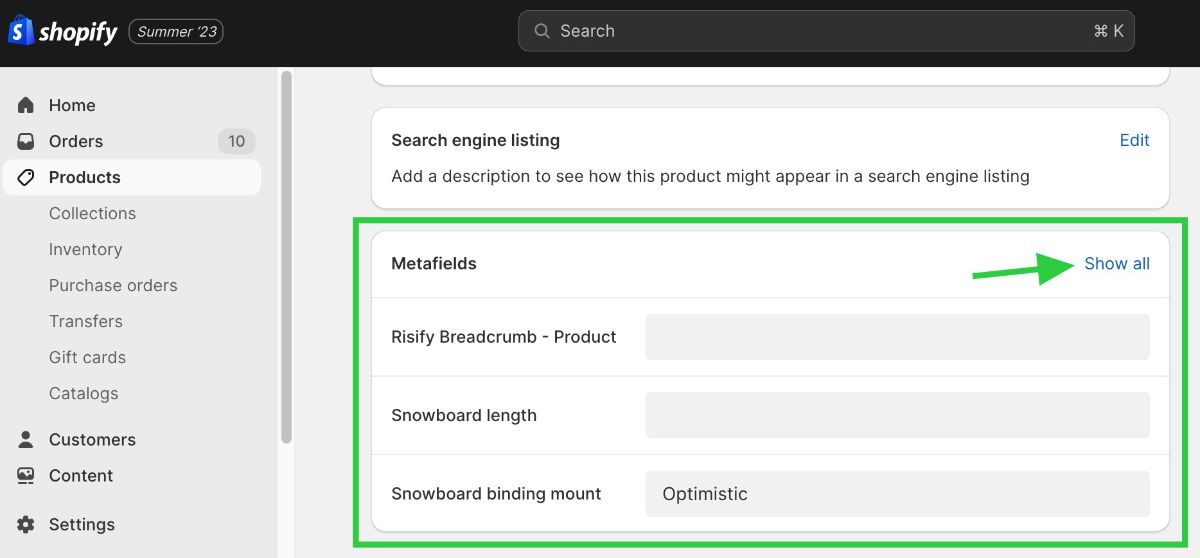
In the metafields, view Risify FAQ - Product. You can select or remove FAQ entries. All done!