Adding FAQs to your store helps shoppers get quick answers, reduce support requests, and improve conversions by addressing common questions directly on product and collection pages.
With Risify, you can manage all your FAQs in one place, assign them to the right items, and display them seamlessly in your theme, making the entire process faster, clearer, and fully integrated with your Shopify store
👉 Curious how Risify Centralized FAQ's can help your store? Browse our FAQ resource library to learn best practices and get the most value from it.
Two Phases of FAQ Setup
Setting up FAQs in Risify requires two phases:
- Phase 1 (Admin): Create your FAQ content and assign each FAQ to products, collections, or pages inside Risify’s admin panel.
- Phase 2 (Theme): Add the Risify FAQ section to your Shopify theme and customize its appearance.
If you finish Phase 1 and do not see FAQs on your storefront yet, that is expected. They will appear after you complete Phase 2.
Phase 1: Create and Assign FAQs in Admin
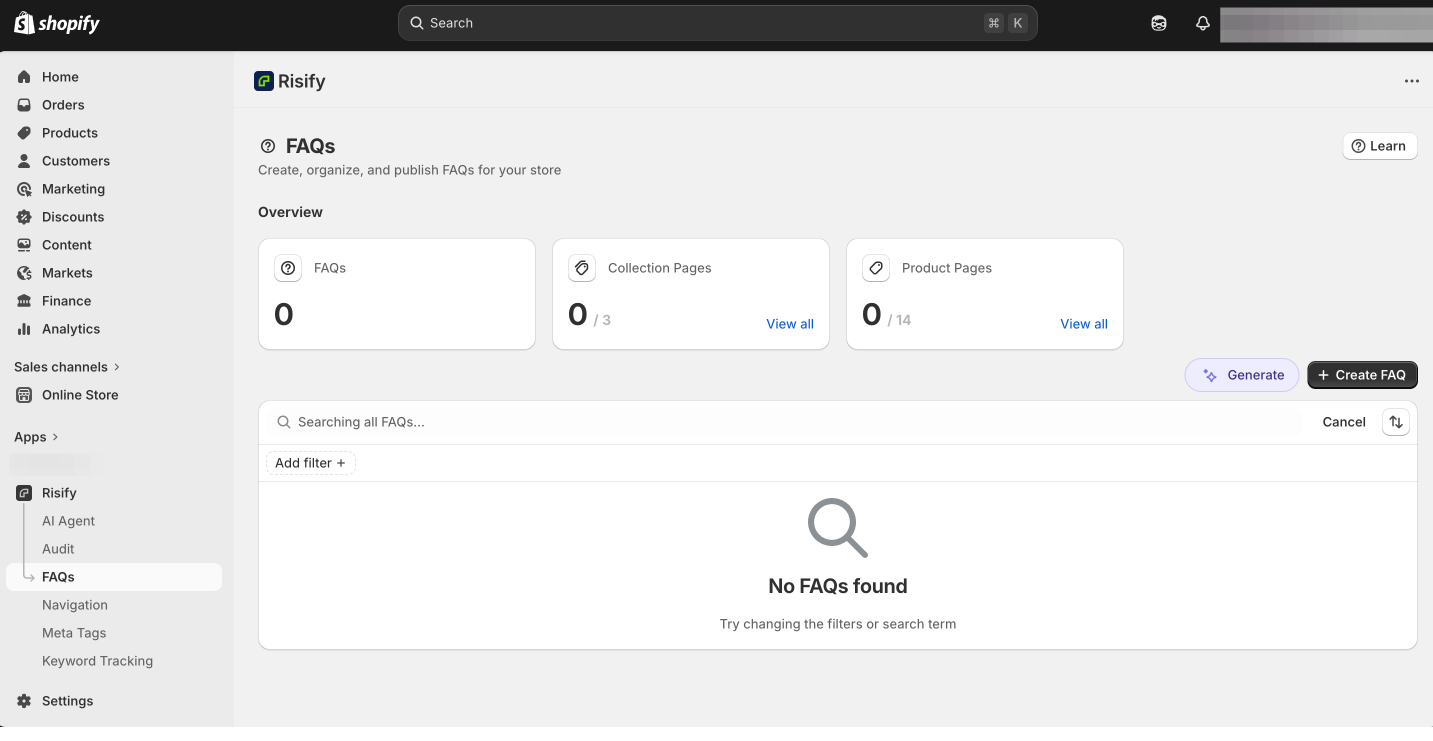
This phase happens inside your Shopify Admin under Apps → Risify → FAQs. You can also activate the feature from Settings → FAQ’s → Turn on Feature.
Step 1: Activate the FAQ Feature
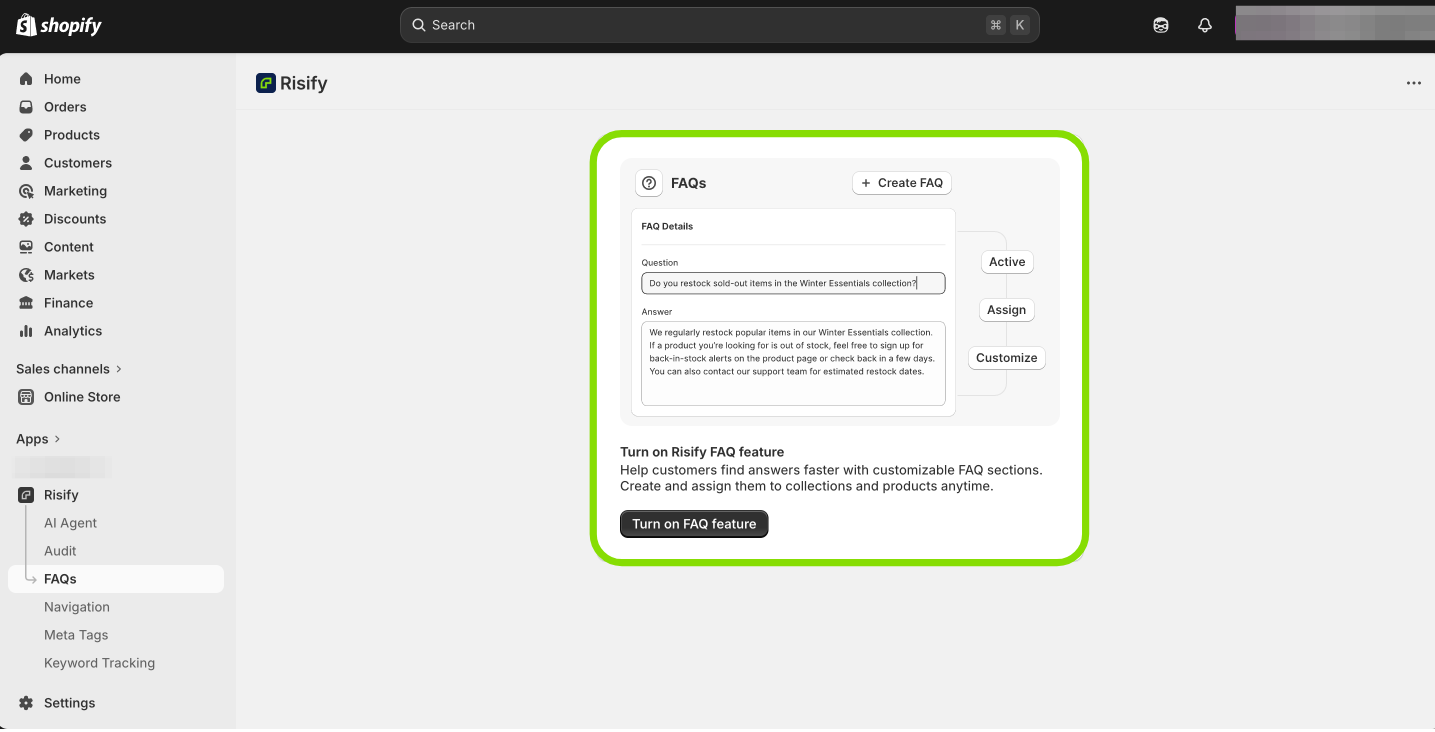
When you first open the FAQs page, you will see a confirmation window titled “Turning on FAQs Feature.” This asks for permission to create the metafields that store your FAQ data directly in Shopify.
Click Turn On to continue. Once enabled, the FAQ feature becomes active. Your FAQ data will always remain safe in your store, even if you uninstall Risify.
Step 2: Create a New FAQ
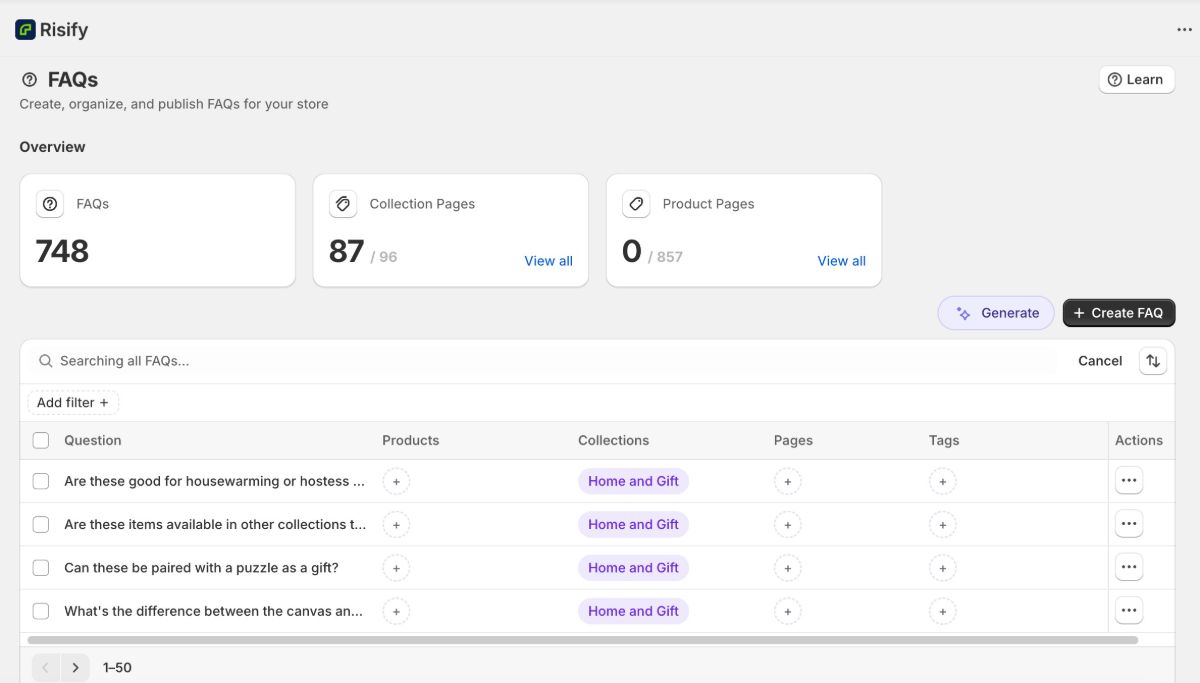
After enabling the feature, you will land on the Manage Your FAQs screen. This is where all your existing FAQs are listed and where you can add new ones.
Click the Create FAQ button in the top-right corner. A new editor will open with the following fields:
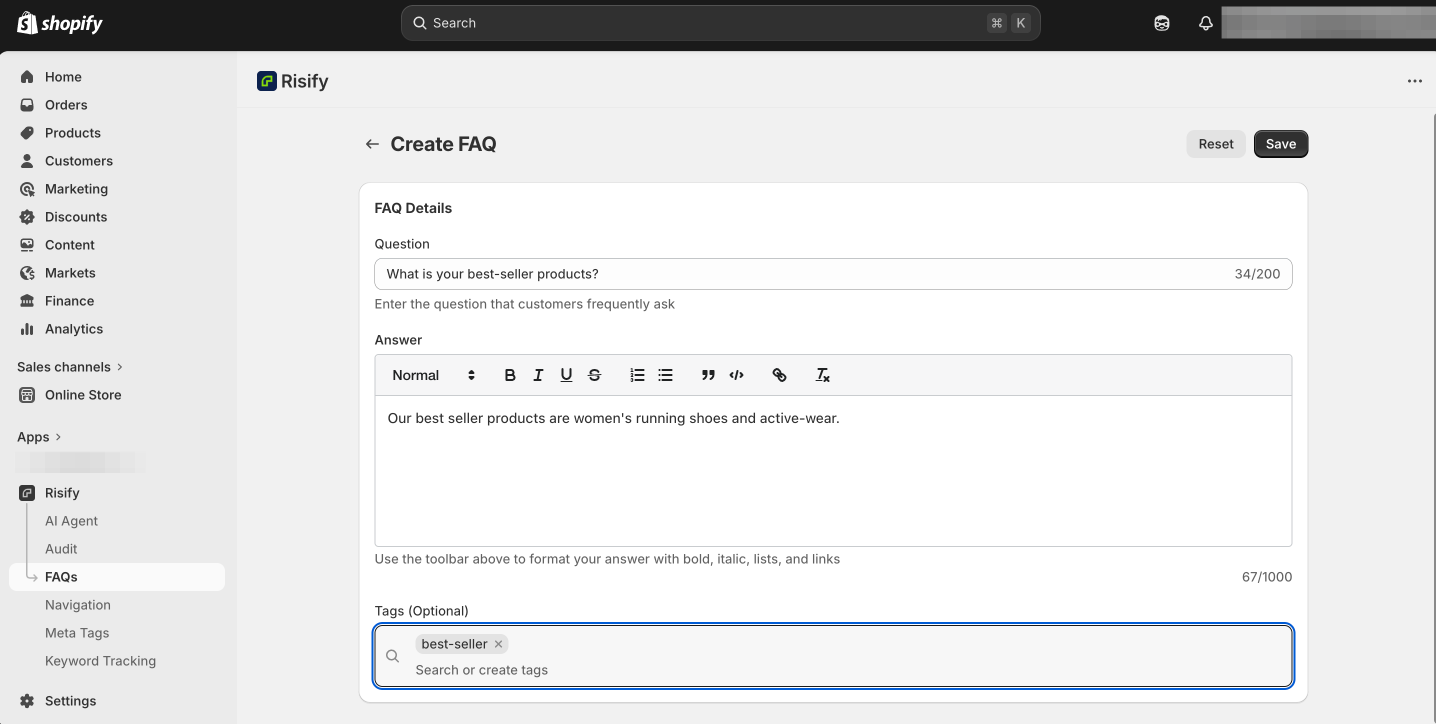
- Question: Enter a clear, specific question that your customers often ask.
- Answer: Write a detailed, helpful response. You can use the toolbar to format text, add lists, or include links.
- Tag (optional): Add or select a tag to group your FAQs. Tags make it easy to organize FAQs by topic and assign them in batches later.
Click Save when you are done. Your FAQ will appear in the list, ready to be assigned.
Tip: Each FAQ can be reused across multiple pages, so write answers that stay relevant in different contexts.
Bonus: Create FAQs With the AI Generator
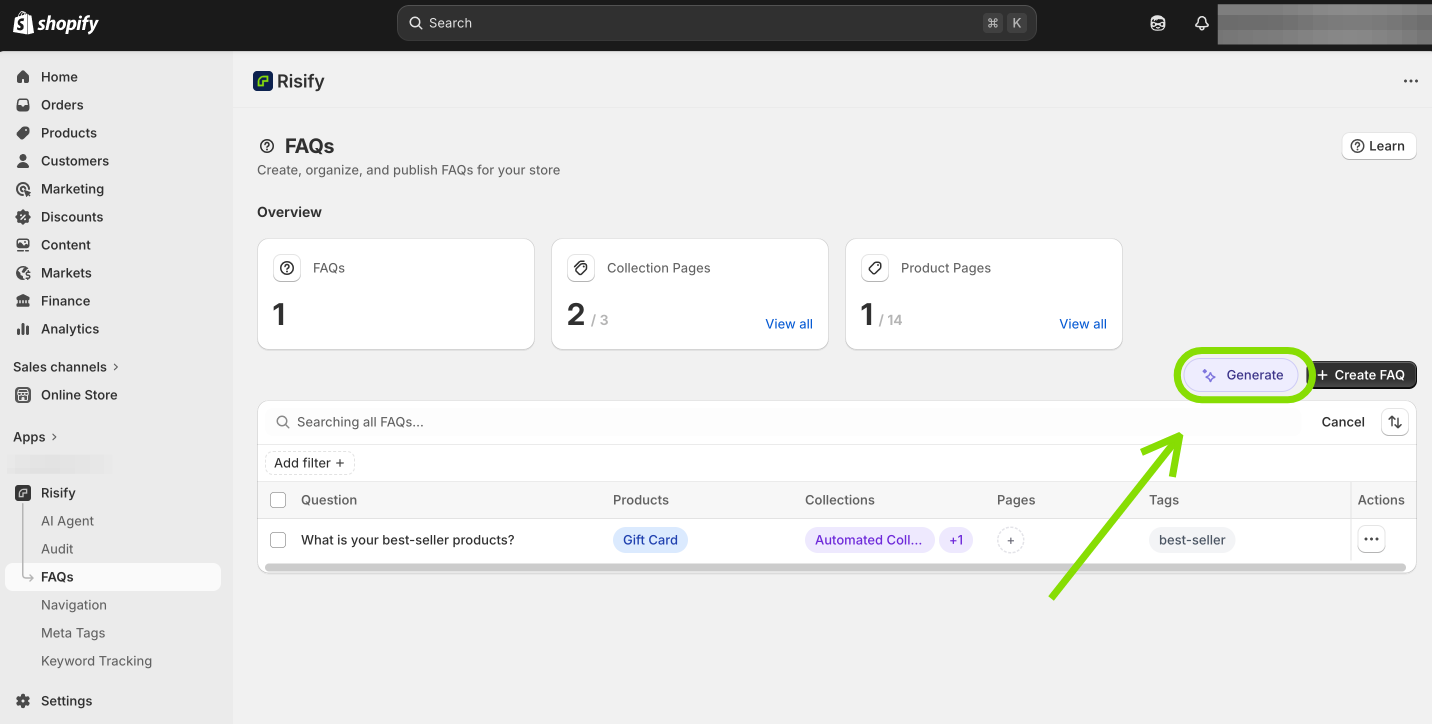
If you want to create multiple FAQs at once without writing them manually, you can use the AI Generator to do it automatically. Here is how:
- On the main FAQ tab, click the Generate button.
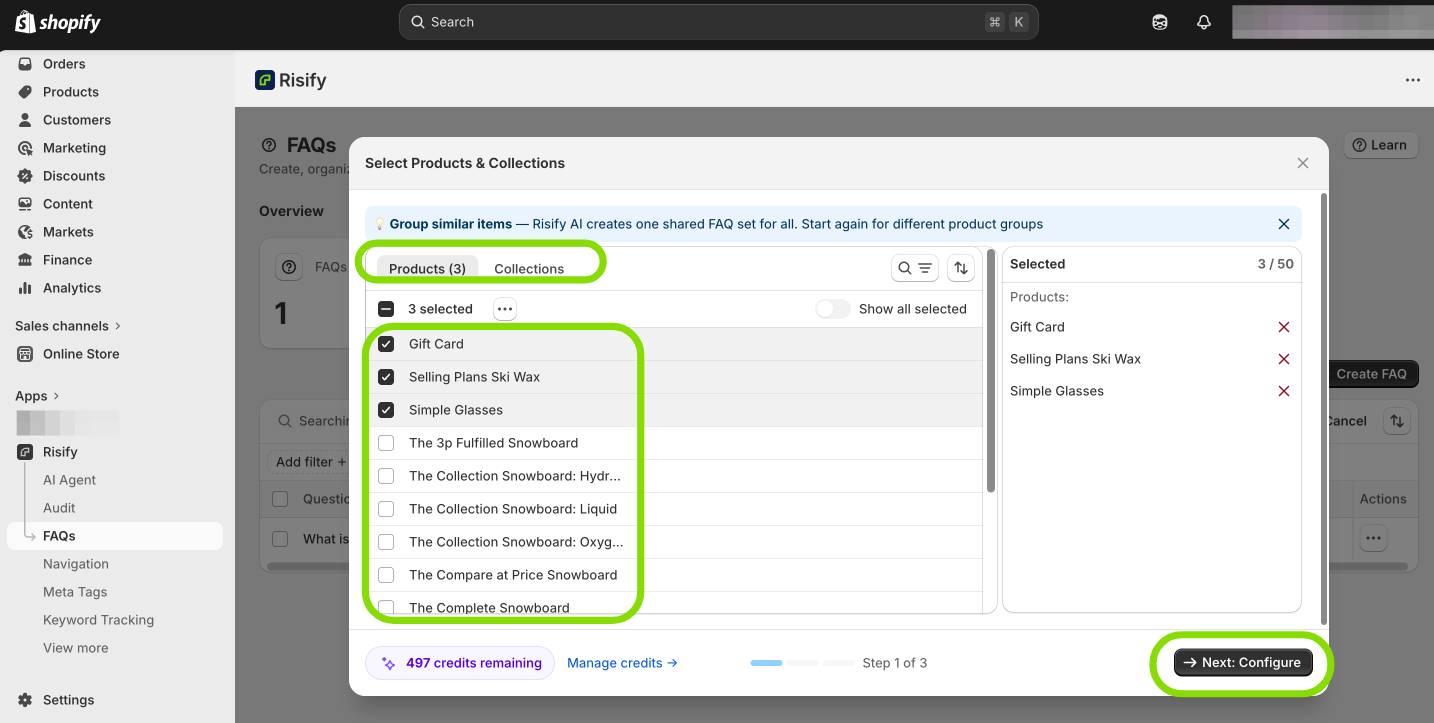
- Select the products and collections you want to create FAQs for. Click Next: Configure.
- Choose how many FAQs you want to generate for each selected item.
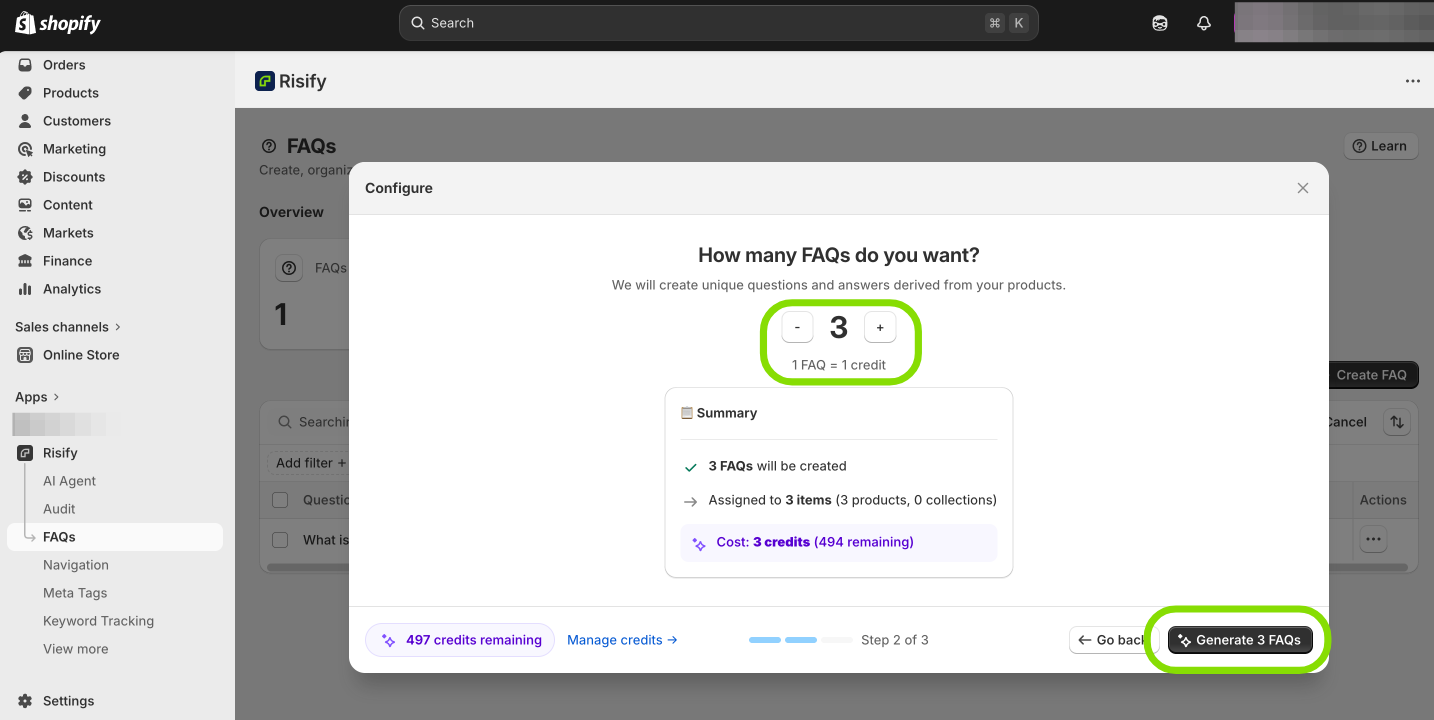
- Click Generate FAQs.
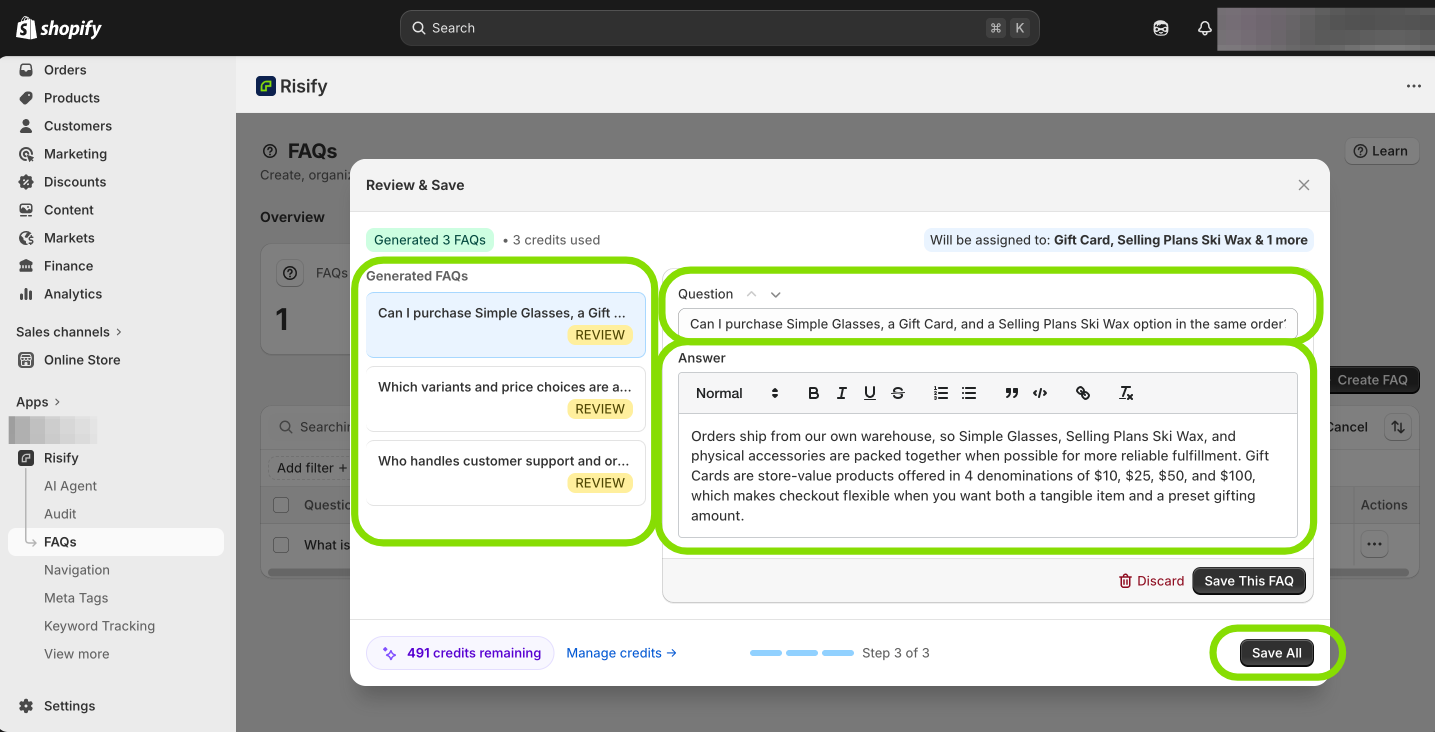
Risify's AI will create relevant questions and answers based on your selected products and collections. Each generation uses AI credits. Once generated, the FAQs appear in your list where you can review, edit, and assign them just like manually created ones.
Step 3: Assign FAQs to Products, Collections, or Pages
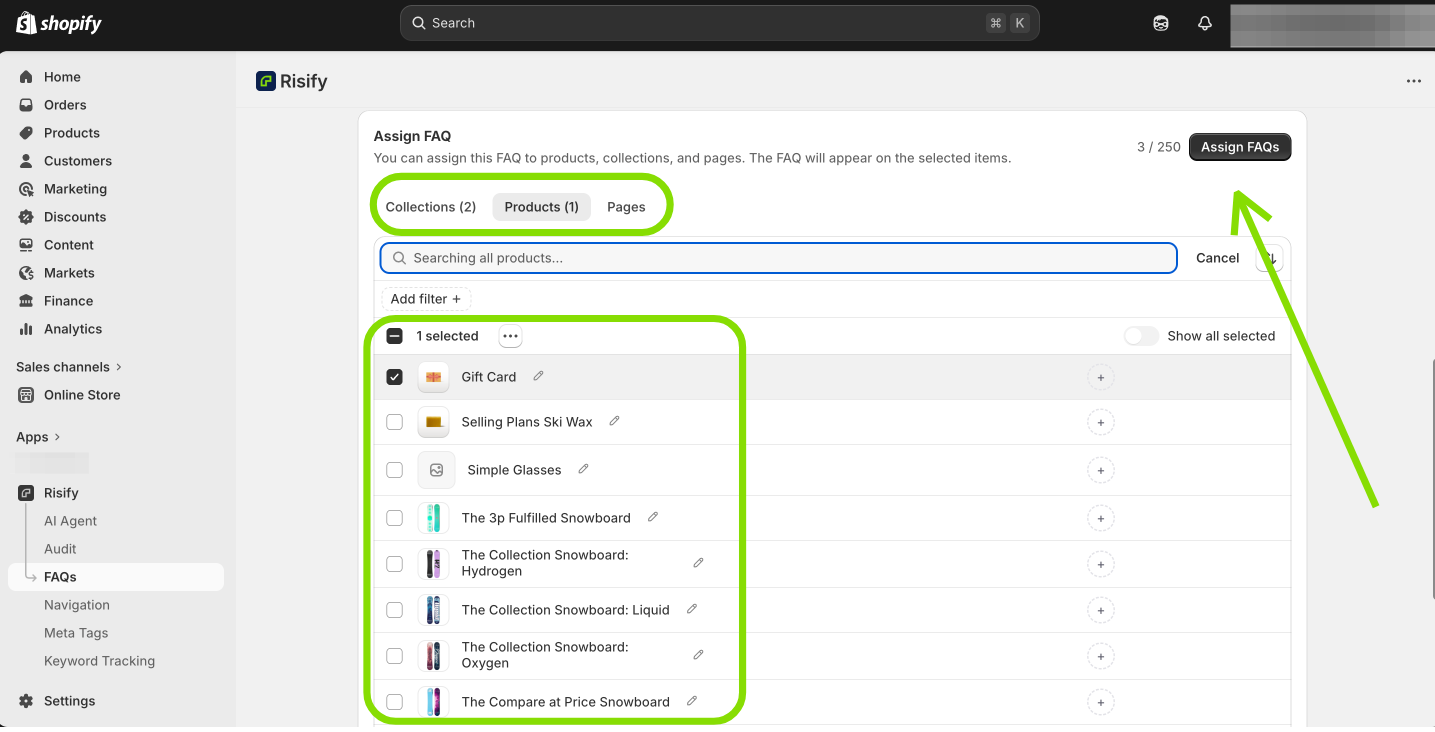
Creating a FAQ is not enough, you also need to decide where it will appear.
Go to the FAQ row and click the + symbol under the relevant column (Product, Collection, or Page). Select the pages where you want the FAQ to appear and click Save.
The FAQ is now linked to those pages and will display once you complete the theme customization step. If you later want to remove it, uncheck the pages and save again. This updates the assignments without deleting your FAQ content.
What Happens Next
Your FAQs are now active in Risify and correctly assigned inside Shopify Admin. However, they will not be visible on your storefront yet. That happens in Phase 2, where you add and style the FAQ section inside your theme.
Phase 2: Add and Customize FAQs in Your Theme
In this phase, you display your FAQs on the storefront through Shopify’s Theme Editor.
Step 1: Open the Theme Editor and Add the FAQ Section
In Shopify admin, go to Online Store, find your theme, and click Customize. Switch to the collection, product, or page template where you assigned FAQs in Phase 1. Navigate to the specific page to make sure the correct content appears.
In the left sidebar, click Add Section, switch to the Apps tab, and select Risify FAQ. The section will appear on the page (usually at the bottom by default). You can drag and drop it to your preferred position, FAQs are generally best placed at the end of the page, just above the footer.
Step 2: Customize the FAQ Design
Click the Risify FAQ section in the sidebar to open its settings panel.
General
- Section Width: Choose whether the FAQ matches your theme’s content width, spans the entire screen, or adapts to its container.
Card
- Toggle Icon: Choose how questions expand and collapse, Plus/Minus or Arrow.
- Style: Select between Outline, Filled with Shadow, or Filled with Bottomline.
- Border Width: Adjust the thickness of the card outlines.
- Border Radius: Set corner roundness (None, Small, Medium, Large, or Full).
Content and Typography
- Heading: Customize the section title (e.g., “Frequently Asked Questions”).
- Heading Style: Choose the HTML heading level (H1–H6).
- Title Font Size, Family, and Alignment: Adjust the look of your section title.
- Question Font Family, Weight, and Size: Control how questions appear.
- Answer Font Family, Weight, and Size: Define how answers appear for readability.
Colors
- Background: Background color of the overall FAQ area.
- Border: Color of the borders around question and answer cards.
- Title Text: Color of the FAQ section’s main title.
- Question Text and Background: Color for each question line and its background.
- Question Hover Background: Color when a customer hovers over a question.
- Answer Text and Background: Color for the answer text and its background.
Spacing
- Container Vertical Padding: Controls the space above and below the FAQ section within its container.
Step 3: Save Your Changes
When you are satisfied with the layout and styling, click Save in the upper-right corner. Your FAQs will now appear on the relevant pages, styled to match your theme.
Summary
By completing both phases, you set up a complete FAQ system for your Shopify store:
- Phase 1 creates and assigns your FAQ content inside Risify’s admin panel.
- Phase 2 displays and styles the FAQs on your storefront through the Shopify Theme Editor.
Together, these steps give your customers quick answers directly on the pages that matter, while keeping everything manageable from a single place.